Labels

BASS (50) COMPRESSION (32) DRUMS (45) EFFECTS (49) EQUALIZATION (30) GUITAR (112) HOME RECORDING (95) IMPULSES (21) INTERVIEWS (19) KARAOKE (1) LIVE (10) MASTERING (61) MIDI (21) MIXING (179) REVIEWS (156) SAMPLES (69) SONGWRITING (19) SYNTH (3) VOCALS (31)

Saturday, December 29, 2018

Normalizer vs Maximizer vs Limiter: what's the difference? (With free Vst Plugin)


Hello and welcome to this week's article!

Today we are going to expand our knowledge about Limiters by clarifying a fundamental difference: the difference between a limiter and a maximizer.
Sometimes in mastering suites or in the plugin bundles that comes with a Daw these two concepts are exchangable, like they mean the same thing, but it's not exaclty like that, and today we are going to see why.

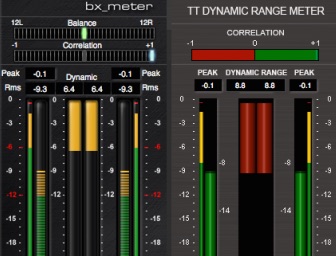
We have already covered what a Limiter is: it is a tool that takes a track at mixing volume (usually around -12db) and that sets a ceiling that cannot be surpassed, then with the gain control we can gradually rise the volume until it sounds on par with the commercial tracks (this is if we are using the limiter for Mastering, but we can use it also to tame certain single tracks in a mix).

A Maximizer instead is not only a limiter but it includes also one: it is a tool used to get the most volume out of our recording by applying 2 different processes to our track: a Limiter and a Normalizer.

A Normalizer is a processor that takes the loudest peak of our signal and boosts the whole track until this peak reaches the set ceiling, but the maximizer first applies a Limiter that levels down the loudest parts (according to the a selected threshold) and THEN applies a Normalizer, thus first reducing the dynamic range of the track and then rising the overall volume.
The reduced headroom creates more space in which we can pump up our track.

While a Limiter as we have said can be used also on single tracks during the mixing phase, a maximizer is used almost exclusively during mastering, therefore it often features dithering and other tools made to finalize the track: unless you are using it for mastering, you might want to turn these extra features off.

Which one to use? It depends on the type of music: if the music is very uncompressed and presents a lot of headroom, a maximizer can help in reducing the excessive dynamic range, but if the song is already quite compressed (e.g. edm) the dynamic range can be already little, and a maximizer can end up in creating distortion artifacts and messing with the low end, by producing a "pump" effect that is rarely desired.

My final suggestion is to use a Limiter as a general rule, and to switch to a Maximizer only if the mix sounds still weak and too many loud peaks that eats up too much headroom, but be always very careful in leaving enough dynamic range in your song, or it will become ear fatiguing and less enjoyable.

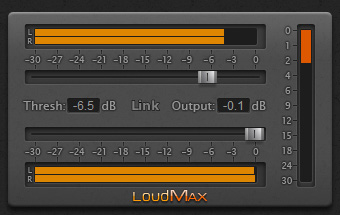
Today there are many maximizers available for download, both  free and paid, but a free example of limiter is the LoudMax by Thomas Mundt, that can be downloaded HERE.
Let me know what do you think about it!


Become fan of this blog on Facebook! Share it and contact us to collaborate!!

Saturday, December 22, 2018

Mastering levels for streaming, cd and club play PART 2/2


CLICK HERE FOR PART 1/2


Now that we have a very basic explaination of the main values to check out we can see the chart with the suggested levels for the various environments: we should use good metering tools during mastering and keep in mind the main reproduction platform our mix will be played from if we want to optimize the quality:


Platform                                             Peak                   Loudness                 Dynamic Range


iTunes Store and Soundcloud        -1.0 dBTP           -9 to -13 LUFS                     min 9DR

iTunes Radio                                    -1.0 dBTP          -15 to 16 LUFS                     min 9DR

Youtube and Spotify                       -1.0 dBTP          -13 to -15 LUFS                    min 9DR             

CD                                         -0.1 to -0.5 dBTP               min -9 LUFS                    min 9DR

Club Play                                          -0.1 dBTP           -7.5 to -9 LUFS                    min 8DR         

     
Obviously these values can be modified according to the genre, just keep them in mind as maximum limits not to cross, then if you have for example a jazz song with 16db of dynamic range it's absolutely fine!

I hope this cheat sheet is useful (and I would like to thank also the Mastering the Mix website for the source of informations), let me know what do you think in the comments!


CLICK HERE FOR PART 1/2


Become fan of this blog on Facebook! Share it and contact us to collaborate!!

Saturday, December 15, 2018

Mastering levels for streaming, cd and club play PART 1/2


Hello and welcome to this week's article!

Today we are going to expand our mastering articles about metering and the loudness war with some average guideline about the correct levels to use, in order to make our songs play at their best in the various environments.

Why do we need a specific type of mastering for a specific purpose? Why can't we use the classic cd mastering for all platforms?
Of course we can, the problem is that several platforms perform some processing to the track on their own, usually compression, or limiting/maximizing, to reduce the differences in level between the songs, and we need to anticipate those moves in order to avoid a mix that distorts, or that sounds too squashed.

Before getting into the numbers we need to get acquainted with 3 acronyms:

Loudness Units Full Scale (LUFS): it's the scale used to describe the perceived loudness of audio material. Until some year ago, due to the loudness war that was raging in radio and tv, mastering engineers were encouraged to push the perceived loudness as far as possible, while today streaming services lowers the volume of the louder tracks to make them all fit in a same standard, and this encourages the mastering engineers to do the exact opposite: the idea is to privilege sound quality over a song that's constantly on the verge of distortion.

Decibel True Peak dBTP: when we record a sound with our audio interface, the analog curve (which is rounded) becames a serie of ones and zeroes, basically a ladder, and when we export the mix to reproduce it, the reproduction device (for example a stereo) needs to turn it back into a curve; doing so it rounds also the loudest parts (which sometimes can become flat in the digital realm), and this can result in a slight increase in volume.
This is the reason why we shouldn't master our tracks with output 0db, because with the conversion process, it can turn easily into distortion.
How do we solve? We need to master at a slightly lower peak (for example -0.5db) in order to avoid this "inter sample distortion".

Dynamic Range (DR): this third and last criteria is extremely important: it's the distance between the quietest (the "short term LUFS") and the loudest parts (the peaks) of our mix. If it's too reduced it means the song is overcompressed or overlimited, and this means that probably the transients, which are the punchiness of the song, are getting lost.
Nailing the right dynamic range is essential for a good mastering, and as a general rule we should never have a dynamic range lower than 8db: the lower the number, the minor the range.

CLICK HERE FOR PART 2/2


Become fan of this blog on Facebook! Share it and contact us to collaborate!!

Saturday, December 8, 2018

Review: Audio Assault Druminator


Hello and welcome to this week's article!

Today we are reviewing a new drum sampler from Audio Assault: Druminator!

Druminator is a Vst drum sampler that features a drumkit with 2 snares and 2 kicks (with the possibility of retriggering), several routing and mapping options and a surprisingly complete array of in-built effects: Compressor, Clipper, Saturation, Transient shaping and Reverb, plus a quite complete mixer with independent channels (in which also the mic bleed is controllable).
  
The first thing that I have noticed is that this plugin shares the same clean and rational user interface style of other products of the brand (like the Grindmachine II); I appreciate it a lot because it tries to minimize the number of menus and to show everything in the most tidy and intuitive way possible.

Then I have started to fiddle around with the kit: unlike many other drum samplers that have only processed samples, Druminator samples are unprocessed, and the presets (like the Metalcore one I have used for the video) just use the bundled effects to get to the final result: this gives us an impressive flexibility, and basically lets us take care of the drum track without the need of any external plugin (another thing that I love). 

The sounds are good, very usable (in the video sample I have made I have just loaded a preset and left the sound completely untouched), balanced and clean, and it can be used with a wide range of genres, from rock to the most extreme metal.
Consideting the price, which is very affordable, this drum sampler is a great bang for the buck, probably the most feature packed drum vst in the price range, and I definitely suggest you to check it out (there is also a trial version).

Thumbs up!


- Unprocessed Drumkit with 2 snares and 2 kicks

- 2 band parametric equalizers with shelves and filters for all channels

- Compressor, Clipping, Saturation, Transient Shaping & Reverb

- Trigger channels for snare and kick, blend your own samples!

- Multi-Output for mixing outside the plug-in.

- Editable mapping, various formats included


Become fan of this blog on Facebook! Share it and contact us to collaborate!!

Saturday, December 1, 2018

free karaoke software and how to use it


Hello and welcome to this week's article!

Today we are talking about a topic that is not strictly tied to home recording, but that is another way to enjoy music together, so since I've been requested an article about it, I thought it's worth mentioning, once in a while.

Karaoke is a great way to have a fun evening with friends that doesn't play music, and the internet offers plenty of software, both free and paid, to load your lyrics and synchronize them with a music video or a static image.
There are several standards in which lyrics can be loaded (from huge archives that can be found online) in any software, and the most common is .KAR.

The plugin we are showing in the picture as example (but more or less they all work in the same way) is OkeOke.net, an open source karaoke program available also in portable version, that offers the essential features to enjoy an embarassing karaoke night.

What you need is the mp3 or the video of the song and a karaoke file supported by your karaoke software, and with the software you can run the song and it will sync it with the karaoke file showing the lyrics at the right moment.
Some file formats features also directly the Midi file alongside with the lyrics, so that no additional file is needed.

Another alternative is to go to one of those free Youtube to avi websites and download directly a karaoke video from Youtube, and to create a library of videos with the lyrics hard coded.


Here are some free karaoke players, but there are many others available online (a bit harder is to find the free version of the karaoke files, but there is some library around):

- Walaoke: a free karaoke player that also offers an android app to control it.

- Karafun: a karaoke player that supports also video and that offers an internal search engine.

- Okeoke.net: the aforementioned, free karaoke player, which is made by a media player and a part in which you can load .KTV files and let the two parts run together to sing synchronized with the lyrics (the portable version won't work on some computer).


Become fan of this blog on Facebook! Share it and contact us to collaborate!!

Saturday, November 24, 2018

Review: Audio Assault Grindmachine II + Discharge Pack (with video sample)


Hello everyone and welcome to this week's article!

Today we are reviewing a new guitar amp simulator, the top of the line of the Audio Assault producer: Grindmachine II!

Grindmachine II is the successor of Grindmachine, which was a very popular guitar amp simulator, highly praised in the internet mixing community, and it offers something different from all the other virtual amps, which try to use scheumorphism to replicate the look of amplifier and pedals: the interface of Grindmachine 2 is similar to the one of a POD, in which you choose amp and cabinet, and the controls stays the same.
This is very effective once you get acquainted with the interface, because you only need to learn the interface once, and all the models will be controllable in the same way, making the tweaking faster and easier.

The controls are very simple: there is an eq section with presence and master control, an intelligent noise gate, the amp and the cabinet section can be individually activated and deactivated (there is also an IR loader), and there are 2 more controls: Tight and Impact.
Tight is a switchable booster that adds gain and overall tightness to the sound, while Impact recreates the movement of the speaker, adding thump and low end, and it can be compared to the "resonance" control of the Peavey 5150.

The plugin comes with a wide range of amp simulations which are not directly a recreation of original amps but more a blend of some (for example PVGL, which is halfway between the lead channel of a 5150 and an Engl), and it has both clean and distorted tones, plus it has a serie of loaded Impulse Responses of different kinds, from 1x12 to 4x12 (and you can also load yours).
There are also original tones, which have been designed exclusively for Grindmachine II.

There are also currently 2 expansions: Discharge and Hidden Gems amp pack, which can be downloaded separately, and which expands furthermore the possibilities of this plugin: I had the chance to try the Discharge pack, which is focused on hi gain tones, and I must say that the tones are really brutal. In the video I have used the Ultra Jcm model, which recreates a modded Marshall Jcm with added gain to make it even more aggressive.
The sound that you can hear on the video is Grindmachine II with no booster (but I have used the Tight switch), and as you can hear the tone is really metal, with no other plugins needed.

The plugin sounds very well and it is very versatile, but here is some suggestion for a Grindmachine III: I would add a simple tuner, unite into it the Dirt Machine plugin to provide more boositng options, and I would add a simple effect section, so that we could add some delay or reverb to a solo without the need of adding an external plugin.

The only thing left to say is to go to the Audio Assault page and check it out, these plugins are a great bang for the buck and you will surely find a tone you like.

Thumbs up!


Become fan of this blog on Facebook! Share it and contact us to collaborate!!

Saturday, November 17, 2018

How to clean up a distorted guitar and bass sound using eq


Hello everyone and welcome to this week's article!
The article of today is a focus on guitar and bass hi gain sound, so it should be used as addition to our article How to mix a rock/metal guitar and How to mix a rock/metal bass.

This article will only talk about the distorted, hi-gain guitar and the hi-gain part of a bass track (if you are using a dual or more tracks technique), and starts from the assumption that a distorted track has by nature a good part of noise and resonances, and we need, from that noise, to minimize the bad part and emphasize the useful one.

How do we tell the good part from the bad part?
By nature a distorted track adds a big amount of gain and saturation in all frequencies, therefore along with an important increase of level for what is the original sound of our instrument we end up with a lot of "dirt", which eventually might end up by covering the other instruments, or producing unwanted peaks that prevents us from rising the overall volume.

By finding and notching out those peaks and resonances we will free a considerable amount of headroom (very hard to point out at first listen, unless you have a trained ear) that will let us raise the volume of the track, making it more present and at the same time it will sit better in the mix. Sometimes, in facts, we might feel our guitars weak, low in volume, not very present, but if we rise the volume we will have it reaching the maximum level and clipping while it still sounds weak and low; that's because some frequency that we might even not notice at first is so high in volume that hits the ceiling before all the rest, thus keeping all the rest of the curve low.

How do we find these resonances to notch out?
The nature and the modern technology comes in our aid, with our ear (here's an ear training tutorial) and with frequency analyzers (here's a dedicated article).
Obviously frequency analyzers are importants because we can see right away if there are resonances and take them down some db until they are aligned with the rest of the curve, but the thing that makes the difference between a regular mix engineer and a good one is by using the ear to clean up the track.

It's very simple to do once you know how to do it: you create with an eq a narrow notch and boost it considerably, around 6/10db, then you start sweeping left and right through your distorted guitar and bass sound.
You will hear every kind of weirdness but what we are looking here are the frequency areas that does not resonate with the note that the instrument is playing in that moment (for example in a guitar riff with a sequence of notes), leave the parts in which you can hear strongly the note played and focus on the parts in which there is a noise, a weird sound, that remains the same regardless from the note played.
Those are the frequencies we are looking for, and once we isolate them, we must take them down 2 to 4db, until they are not so prominent anymore.

Think about those frequencies as junk to remove: what we are aiming here is to notch out 2 or 3 of these areas, quite surgically, in order to make room to the part of the sound that will be actually audible in the mix: the ones that comes with the note; the others are useless and eat up only headroom.
I'm not writing specific frequencies here because they vary according to an infinity of factors: guitar, pickups, string gauge, amplifier, and most importantly, the tuning.

I hope this was helpful!


Become fan of this blog on Facebook! Share it and contact us to collaborate!!

Saturday, November 10, 2018

Review: Audio Assault Emperor (with video sample)


Hello and welcome to this week's article!
Today we are reviewing a brand new guitar amp simulator: Emperor, by Audio Assault!

Audio Assault is a Mexico based software house focused on music production, and they offer a wide array of plugins, ranging from equalizers and drum samples to virtual amplifiers.

Today we are going to check out the latest virtual amp of the company: Emperor.
Emperor is a suite focused on metal and rock tones, which includes a dual channel hi-gain head, a pedalboard with 5 slots (in which you can choose between 10 stompboxes, ranging from boosters to modulation effects, from a compressor to an auto-wah - the only pity is there's no tuner!) and a cab section with 4 cabs and 4 microphones (which can be moved freely on the grill, you can select also the distance).
Plus, there's also an IR loader included with 14 custom IRs.

As I have already said for other recent guitar amp simulators, technology today has gotten to a point in which it is possible to achieve a very credible guitar sound with plugins, also with the not expensive ones (and this Emperor has an extremely good quality to price ratio), after years in which we had to buy very expensive gear and suites in which it was very hard to achieve a decent tone, before dropping everything and switching back to a real amp.

I have followed guitar amp modeling since the beginning, since the '90s, and I must say only in the latest years technology has really gotten this close to reality to really let anyone plug a guitar into the audio interface and dial in a good tone.

Even more recently, I have noticed a beautiful trend in which guitar amp simulators have become really user friendly: now it's as easy to craft a good tone as using a real amp, which was unthinkable up to few years ago; back then the producers were focused in offering as many options as possible (as many amps, as many variables, as many tube types and bias settings possible), with the result of being dispersive, and this is the real revolution: today producers are focusing in offering an easy interface which sounds good since the beginning.

I had to tweak the amp literally for 5 minutes before coming up with the tone that can be heard in the video: I just added a Tube Screamer in front, played a bit with the eq, and chose the right microphone.

All I can say is that Emperor is a simple, very quick and effective guitar suite which will offer you a wide range of crunch tones, from a mild overdrive to the most extreme and modern Djent (no clean tones basically), and most important, all the tones are very realistic and usable, making it a smart and complete choice.

Thumbs up!


Become fan of this blog on Facebook! Share it and contact us to collaborate!!

Saturday, November 3, 2018

Expander / upward compression (a guide for dummies)


Hello and welcome to this week's article!
Today we are bringing a new topic on our infinite list of article about compression: upward compression!

What is upward compression?
It's a type of compression that works exactly in the opposite way than the regular one: you set a ceiling, and decide a whole wave signal or part of it (with a multiband compressor / expander) in which the volume will be increased until it reaches the ceiling.
To make it easier: we choose a part of the sound, or the entire sound, and make it louder until it reach a certain level.
The signal is increased within a ceiling or within a range (some expander has the control named "range" in which the upper limit is the ceiling), and it just increases the volume below the threshold (rather than lower it as a regulal compressor would), putting it into "the range".

If we are expanding the entire sound until it reaches the ceiling, the result will be the same of a regular compressor: the loudest parts of the sound will be attenuated, the quietest will be raised in volume, that's why this procedure is more suited when it affects only a certain frequency range.

Why do we do this way instead of just raising the volume?
To have more control over our transient;
in facts, if we have a sound that is too much oriented on the high end and we want to bring out the body whilst at the same time mantain controlled the dynamic range, we can expand the low end of that sound (like in the picture, in which only the low mids, the part coloured in blue, is expanded, while the part in purple is normally compressed).

Why don't we just use an equalizer to boost the part we would like to expand?
Same answer: because we want to control the transient and avoid it to have too much dynamic range, with volume spikes that can end up out of control.

The uses of an expander are several: to reshape the sound of a microphoned guitar or bass that sounds too thick or too thin, to give life to certain frequency areas of the room microphone of a drumkit, or to apply corrections in a band recorded with few or one single microphone.

This leads us to the same dilemma we arrived when talking in general about multiband compression:
is it a compressor? Is it an equalizer? Many producers consider it the magic wand to solve every mix and mastering problem, while others prefer using the basic tools (broadband compression, equalizer, volume) following the rule that it's better to use few simple tools and master them rather than experiment too much with more complex tools with the risk of ruining a mix.

What is your opinion? Do you use multiband compressor and expanders?
Let us know!


Become fan of this blog on Facebook! Share it and contact us to collaborate!!

Saturday, October 27, 2018

Review: It Might Get Loud - Assault Drums (with video sample)


Hello everyone and welcome to this week's article!
This time we are reviewing the latest drum sampler from It Might Get Loud: Assault Drums!

The company once again offers a product that is in line with its trademark: instead of offering the usual, generic drum sample library, IMGL focuses on something that wasn't there.
Assault drums is a serie of 3 drum kits (divided in 11 presets) that aims to recreate the typical sound of the '80s and the '90s, with presets dedicated from the early Iron Maiden to the '80s arena rock, from the '90s thrash of Metallica and Megadeth to Pantera and much more (black, death metal etc). 

The project is really ambitious, probably the most ambitious the company has ever done, and the uniqueness of this plugin is really its selling point.

The samples are all pre-processed, a necessary step to create presets that sounded as close as possible to the reference albums, and I must say the kits are pretty much similar to the sound they are named after: with some fiddling is possible to obtain very good sounds even just by using the mixer integrated in the plugin.

On a side note, I prefer the mixer "all in one screen" like in other samplers of the same producer, this modular one is less intuitive, even if I understand that there are too many channels to show in one single panel (maybe the ui could be increased in size).
Another thing I would suggest is to start as default with all the channels of the vst routed to channel one, and to let the engineer route (or group) individually those he wants to send to a bus instead of starting by assigning to each drum part a separate channel, it would be more practical.

Technical details aside, Assault drums really sounds like those acoustic drumkits of the old times, the vibe is very similar (especially for some kits like the Iron Maiden style one), and this is a rare quality today, since often modern drum samplers tends to be processed to the point of resulting a bit "plastic sounding", or a bit too electronic. With the right amount of humanizer it's possible to create some very realistic drum parts.

Thumbs up!


Specs taken from the website:

- 11 Kit Presets which will cover a wide range of classic 80's Metal & Rock sounds.

- Classic Early 80's NWOBHM/West Coast Speed Metal Sound

- 3 Full Drum Kits, Multiple Snares, Lots of Toms (Set of Rototoms and up to 5 Toms, that's 8 toms in a single kit!!)

- 11 Kit Presets

- Multiple Routing and MIDI Mapping Options

- Add your own one shot samples


Become fan of this blog on Facebook! Share it and contact us to collaborate!!

Saturday, October 20, 2018

10 best rock/metal riffs of all times

Hello and welcome to this week's article!
Today we are talking about one of the most subjective topics ever: the 10 best riffs of all times.
The criteria are not only obviously my tastes, but their impact in the world of rock and heavy metal, how much they contributed to make electric guitar popular in the history of music, and we will also try to break down a bit what makes them so memorable


10) Ozzy Osbourne: Crazy Train. This riff embodies the soul of '80s hard rock: it's fast, very melodic and happy, but at the same time heavy and catchy. It represents perfectly a time of guitar heroes (like Rhandy Rhoads, who wrote it), excesses and incredible live performances, and makes a very solid base in which Ozzy created his iconic vocal line. Still today it's extremely fun to play and countless bands copied its style.


9) Nirvana: Smells like Teen Spirit. This riff instead brought the grunge movement to mainstream.
It's very simple and has a certain hard rock vibe, but it's an incredible shopping window for the Nirvana music proposal, which is very personal with all its imperfections and the dark vibe. This is one of the songs that contributed the most in changing the tastes of the young audience from the '80s rock.


8) Rammstein: Mein Teil. This German band is another of those bands (like many on this list) with such a strong personality that it's hard to define in a specific genre, it literally brought to light a certain type of metal mixed with EDM (choice extremely courageous), and this riff is so groovy and well structured that is really hard not to nod your head while listening to it.


7) Iron Maiden: The Number of the Beast. Few bands contributed in making popular guitar music like Iron Maiden. The band offers a beautiful hard rock/classic metal by almost 40 years with incredible success, awesome choruses and solos, and they are one of the few bands with 3 guitar players. This song has one of the most memorable riffs ever written in metal.


6) Guns n'Roses: Welcome to the Jungle. Guns n'Roses took  the'70s hard rock lesson of Aerosmith and modernized it in the '80s, with a short first stint made only of 3 albums (if we don't consider the cover one) that had such a strong impact to make it one of the biggest rock bands of all times. This is the opener of their first album, Appetite for Destruction, and the riff is so catchy and the chorus is so effective, that it still sound fresh and actual today. A timeless classic.


5) Rage Against the Machine: Killing in the name. A band that took the sound of the '70 (especially the low gain, single-string riffs of Led Zeppelin) and mixed it with rap, an incredibly groovy rhythm section and lyrics infused with social protest.
This band became a cult in the '90s and still today their influence can be heard in contemporary music.


4) Korn: Freak on a Leash. Korn (together with very few other contemporary bands) redefined the heavy music from the end of the '90s to the beginning of the 2000: the minor, decadent atmospheres of grunge were slowly fading away, leaving place to the same type of young rage, but seen from a different point of view. The guitar tone is huge and with extremely low tunings, the vocals flirt with rap music, and the drum beat is funky and groovy. Their style brought new life to heavy music.


3) Metallica: Enter Sandman. Metallica is the biggest metal bands of all times, and is a band that not only invented thrash metal, but kept on changing skin through its long career exploring several genres, from doom (Devil's Dance) to country (Low man's Lyric). Enter Sandman is the opener of their self titled album, an album which had incredible commercial success but that had let down the most hardcore fans due to their opening to a more radio-friendly type of metal. Nevertheless Enter Sandman is still today one of the most iconic metal riffs ever written, and helped the band breaking the boundaries of the metal community.


2) Deep Purple: Smoke on the water. Smoke on the water starts with a riff that still today is studied by guitarists all over the world in their first lessons, because it's so known (even from those who doesn't know the band) that it's basically a standard. Its chord progression on the beat of the drum defined a whole generation, and helped Deep Purple becoming one of the most successful rock bands of all times.


1) Ac Dc: Highway to Hell. This song takes the first spot because Ac Dc is not only a band. It's an archetype. It's the archetype of '70s hard rock in its purest form, simple, straightforward, melodic, groovy, bluesy and timeless. The band in its 50 years of career never really evolved from its roots and also this contributed in creating their trademark, nevertheless it's undeniable that today Ac Dc songs aged much better than most of the other rock songs, because somehow this formula and this sound still sounds actual.


Do you agree with our list?
Let us know what do you think!


Become fan of this blog on Facebook! Share it and contact us to collaborate!!

Saturday, October 13, 2018

Review: Mercuriall Audio SS-11X with video sample


Hello and welcome to this week's article!
Today we are reviewing a new guitar (pre)amp simulator from Mercuriall Audio: the SS-11x!

As we know (check out our interview) Mercuriall Audio is a Russian audio company that produces guitar amp simulators, some free and some paid, and that is developing a very interesting roster of software, ranging from the emulations of Engl and Marshall to the Mesa Boogie amps, but this time the SS-11X replicates a very peculiar preamp: the AMT SS-1B, a 3 channel tube guitar preamp stompbox created by another Russian company, Amt electronics, which is a producer specialized in preamp pedals, and that is receiving international acclaim for the quality and the innovation of its products.

Compared to its hardware counterpart, the SS-11X offers several extra features: a built in Noise Gate, a serie of boosters (from the classic Ts9 to a full blown distortion), a reverb and an array of good impulses, including some made by Ownhammer, one of the best impulse studio around.
Some of these impulses include also power amp emulation, since the vst doesn't have a power amp section.

The preamp section features 3 channels, 2 separate eq sections, separate gain and level, bright and tone shift switches.
I have been able to achieve surprisingly good tones, very realistic, proof of the fact that technology has taken giant leaps forward in guitar amp modeling: the plugins I am reviewing lately are all very good, to a level that was unthinkable just 3 or 4 years ago, and in this specific one you can really hear the tube sound, the harmonic richness, that makes the crunch fat and meaty.

I suggest this Vst to anyone who wants to achieve good, warm, saturated crunch tones, but the plugin is good also, using the included booster and impulses, for obtaining screaming metal rhythm parts and solos.
The quality to price ratio is impressive, and there is also a free demo version downloadable from the website.

Thumbs up!


Specs taken from the website:

- SS-11X modeling is officially certified and approved by AMT Electronics

- SS-11X is modeled using our next-gen Neural Hybrid Engine. This in-house technology has been in development for 5 years
- All tubes are modeled independently
- Pedals and preamp are working within the same oversampling cycle. Thus, there is no latency build-up and no additional losses when using several anti-aliasing filters
- Stereo-mode: right and left channels are modeled independently. This mode is useful for processing stereo signals. For example, a panned double tracked guitar
- Plugin supports CPU multi-threading

- Cab IRs from (in alphabetical order):
1. George Constantine Kratsas - Mercuriall Audio artist
2. Morton Studio
3. NC-REC
4. NRQ’s Studio
5. OwnHammer
6. Sound Way Records
7. TA Production
8. USOUNDWORKS
- Option to load your own cabinet IRs (mono/stereo)
- Option to load your own reverb IRs (mono/stereo)
Maximum IR length is 262144 samples (~5.9 sec @44.1 kHz)

- Reverb IR blend

Saturday, October 6, 2018

Top 10 Free Vst Plugins 2018


Hello and welcome to this week's article!
Today we are talking about 10 FREE Vst plugin that we suggest you to try, they can be a good start for a small low budget home recording project, and they can provide you a wide array of tools to get in the recording world at zero cost.

It's important to point out that not all of them came out in 2018, but this is a basic package we suggest to download if you are new with recordings and want to try some nice free plugin.


1) Ignite Amps ProF.E.T.: I have put this plugin in the first position because it's today's new (04/10/2018) that this plugin has won the KVR Developer Challenge 2018 (congratulations!). It is a great guitar preamp simulator, good for a wide array of sounds but focused on rock/metal, and obviously it needs a speaker simulator to run.

2) Izotope Neutrino: this is a sort of swiss army knife; it's a multiband compressor hidden in a super minimalist interface, in which you are allowed basically only to choose the instrument (between vocals, drums, bass and guitar/generic instrument) and the amount of the effect. You just slam these plugins in the respective bus of each instrument group and it will analize the spectrum and apply a subtle multiband compression in the areas that are peaking too much or resonating weirdly, and at the end (hopefully) the final track will sound cleaner and more polished.

3) Klanghelm MJUC-jr: anyone that follows this blog from long enough knows how much I love peak limiters; they are the earliest version of compressors, easy to use and good to fatten up any signal, from single instruments to bus compression. This type of plugins are particularly good for parallel compression, or to fatten up acoustic cymbals tracks, bringing out some of the body of the drumset while limiting the peak of the cymbals.

4) Ample Bass P Lite 2: since not always we have a bass or a bass player at hand, this free vst bass sampler can turn out to be a life saver; it recreates the sound of a clean bass that can be controlled via Midi and processed like a normal bass, and it is ideal to streamline the songwriting process, to write down quick rough mixes to share with the bandmates.

5) Mt PowerDrum Kit 2: this is a surprisingly good drum sampler, free to download, which includes several pre processed kits usable for different genres and midi grooves, and it's an amazing starting point for anyone who needs a good drum sampler to record a rock demo.

6) VSCO2 Rompler: this is a good free orchestra vst instrument which can recreate various sections
of an orchestra with a good degree of realism, although obviously the midi track needs to be tweaked accordingly to make it even more realistic and dynamic. The samples are not bad, and it is definitely a good starting point for anyone who wants to try and write an orchestral part.

7) Ignite PTEq-X: in a world of graphic equalizers, PTE eq takes a different route, by recreating a classic hardware parametric eq with a particular workflow (sections can be boosted or cut in a combined way as explained in the review), and it allows us to achieve very natural and realistic results, manipulating the sound in a very musical way.

8) Sean Pandy Drums: this little free drum sampler has a very particular story: it is a simple drum sampler composed of kick, snare, 4 toms and a sub blower (so it should be used in combination with another sampler that includes cymbals) with various velocities etc, but the cool thing is that it consists in samples created by a famous metal producer who released them for free in the past. Now these samples are not available anymore for downloading, but the home producers community kept on sharing and using them, until this guy took them, created 6 velocity layers for each one (not only changing the volume but also the their attack/decay/sustain and envelope) and put them together in this free plugin, so now anyone can use these good samples for free.

9) Softamp GT: this is a vst recreation of the famous Sansamp Gt2 Stompbox, probably the most famous guitar amp simulator that could be used directly into the mixing board before the advent of digital emulation. It features all the original controls (eq, 3 channels, 3 mic placements) and many more new controls, and it just sounds surprisingly good, both for rock and for metal tones, even for the most extreme and scooped ones, thanks to tons of gain and a very fast and definite attack.

10) Audio Damage Rough Rider 2: this is a different type of compressor compared to the aforementioned Klanghelm one, and it is aimed mainly to rhythmic tracks such as drums, bass and electronic beats, because besides adding fatness and punch, it also adds a subtle saturation that makes them even more warm and present.


What about you? Did you know these plugins? Which are your favourite free vst plugins that you use in your projects? Let us know!


Become fan of this blog on Facebook! Share it and contact us to collaborate!!

Saturday, September 29, 2018

Review: Ignite Amps ProF.E.T. with video sample


Hello everyone and welcome to this week's article!
Today we are going to review a new Ignite Amps free Vst plugin: ProF.E.T. guitar preamp!

As we know, Ignite Amps (click here to read the intervies) is an Italian guitar amp and stompbox producer which releases also the vst version of its products for free, and it has created some of the finest guitar related plugins ever made, check out our reviews on this website to know more.

The ProF.E.T. is an overdrive/preamp/distortion in stompbox form, and it is based on an Ignite pedal designed in 2018.
The pedal features 4 eq knobs (the mids are divided in low and high mids, allowing a more precise control), a tone shift switch called "shape", gain and volume.

This unit can be used in front of an amp in the clean channel as a distortion, as an overdrive or as a preamp, and in our sample I have used it as a preamp, putting a booster in front of it to give it even more bite.

The signal chain is all composed by Ignite Plugins: Ltd Mh-417->Tyrant Screamer->ProF.E.T.->TPA-1->NadIR.

I must say that this is probably the best preamp Ignite has ever done: I hardly had to do any adjustment and it sounded killer.
With a booster in front of it it's easy to get a very usable metal tone: in the case of our video it's not too distant from the classic Killswitch Engage vibe.

Without a booster it reacts very similar to an amp, and it's nice to witness how the Ignite technology develops plugin after plugin, delivering with the ProF.E.T. a very realistic, tube-like distortion rich of harmonics.
I suggest anyone interesting in a good distiortion preamp to check out the ProF.E.T: it's extremely good and FREE, and if you like it, you can buy the hardware version too!

Thumbs up!


Specs taken from the website:


- Ignite Amps proprietary JFET non-linear modeling engine.

- 4 controls tonestack with additional Shape switch.

- Mono / Stereo processing support.

- Selectable oversampling rate (up to 8x).

- Global input / output level controls.

- Double precision (64-bit) floating point mathematical model.

- Fully automatable controls.

- Ignite Amps proprietary preset management system with bank file import/export functions.


Saturday, September 22, 2018

5 tips on how to make vocals sit better in the mix


Hello and welcome to this week's article!
This article is intended to be an expansion on our general "how to mix vocals" article, and the purpose is to help, besides the in depth steps of the aforementioned page, the vocals to sit even better in the mix, because vocals, snare and the management of the low end are the tree core components of a mix in which home studios and amateur mix engineers struggles the most.

1) nail the recording: the vocals, as already mentioned in our "how to record vocals" article, needs to be recorded in a room without resonances, otherwise we will find ourselves with a boomy take that will be extremely hard to clean up. If the room is not ideal, consider using a vocal shield behind the microphone: it's better to have an extremely dry take than an oddly resonant one.

2) recording through a hardware compressor: this one is obviously doable only if you do actually have a hardware compressor (it doesn't matter if it's a 1000$ one or a cheap one), or if you are recording through a mixing board with an integrated comp. As we know vocals are one of the most dynamic instruments that can be recorded, and a touch of compression (for example with 2 or 3 db of gain reduction) can help to get "tame" the peaks and the quietest parts in the take at the source. This will simplify a lot our work when mixing.

3) high pass filter: assuming that the take is clean and that we don't have particular eq adjustments to do, the basic step to take is to clean up the low end rumble, which can be caused for example by the breathing, or by an accidental touch of the mic stand, especially when using a condenser microphone. A high pass filter set anywhere from 100 to 300hz down should clean up the vocal track of all the unwanted subsonics that could mess with the compressor.

4) parallel compression: once we have compressed our track normally, we may find ourselves in the common situation in which the vocals are still weak, thin, too dynamic, but that if we compress more, the take becomes dirty and we lose some transient: in this case we can use the New York trick: double the track, crank the compressor in the second track to squeeze it like crazy and put its volume fader to zero, then, while listening to the full mix, slowly and carefully raise the fader of this second track until the vocals are full and round, yet mantaining the transient of the original track unaltered.

5) fx track: instead of loading the effects directly on the vocals track, we can create an effect track, load a delay and a reverb on it, tune them in order to make them with a short and not too invasive tail, and then eq this track in order to make sure the effects will only work from around 1000hz up. This way, when we will send this fx track to the vocal ones, the reverb and the delay will add their magic only to the high end of our vocals, instead of affecting it all, because otherwise they can make the low end of certain types of voice resonate too much and become unpleasant and "dirty".

I hope this was helpful!


Become fan of this blog on Facebook! Share it and contact us to collaborate!!

Saturday, September 15, 2018

Review: It Might Get Loud - RIOT Drums (with video sample)


Hello and welcome to this week's article!
Today we are reviewing another drum sampler by It Might Get Loud prod.: RIOT Drums!

Riot Drums is a library of processed drum samples that is inspired by the classic '90s punk and hardcore albums, and it tries to recreate the raw power of that sound, which was very natural and similar to the rehearsal room one, even in the high end albums.

With this sampler you can achieve very realistic sounds, but unlike for KVLT drums, this one doesn't need any particular extra mixing, the sounds are already very usable (in facts in the video sample I haven't touched them), although with some fine tuning you can really obtain some fantastic drum tones.

This sampler is different from the others of the same software house also because it offers more: more drum samples, several adjustable microphones, a super cool old school mixer interface, which lets you basically mix the drumkit as with a live mixing board, one of these cheap ones that you find in the rehearsal rooms (even with missing knobs!), and several other goodies very useful, but I like how everything is kept simple and essential.

Riot drums is another product of It Might Get Loud Prod., software house that is slowly building itself a name for its products with a very good quality to price ratio, and because it offers something different from the competitors, libraries for specific genres which were simply not available before, and I can't wait to see what will come next (personally I would love some Fear Factory/industrial metal type of library).

Thumbs up!


Specs taken from the website:


- Over 2700 drum samples.

- Drums: 1 kick, 1 snare, 3 toms and a whole set of cymbals (hihat, ride, 2 crashes, china, 2 splashes).
- Each drum has many adjustable mics: Close, room close, room far, overheads and bassdrum & snare 

- includes also close rear mic.
- Each drum has it's own pan and gain knobs.
- Each mic has it's own gain knob.
- Each mic can also be routed to any of the 16 stereo outputs.
- A simple 1 stereo output mode by default.

- Each drumhit's midinote is freely adjustable.
- A soundcheck-mode for adjusting drums without the need of external midiclips during the pre-mix.

Become fan of this blog on Facebook! Share it and contact us to collaborate!!

Saturday, September 8, 2018

5 Songwriting Tips to make your chorus more effective


Hello and welcome to this week's article!

Today I have gathered together some interesting tips on how to create a chorus that would work for our song, regardless for the genre (obviously these ideas needs to be worked and adapted according to the style).

It's important to say that this is not some sort of marketing technique, I don't believe in creating music or any form of art as one would create an industrial product; these are just ideas that have proven to be successful from where to start if we are crafting a song, but the most important requirements, the idea, the inspiration, are up to you.

1) A strong message: a chorus is called like that because, ideally, it would be the part of the song that recurs more often and that encourage people to sing it as a choir, therefore the message works better when it's simple, straightforward and capable of grabbing the attention of the listener.
There are several ways to obtain the attention of a listener: to use a very easy phrase, to use a question, to use terms that calls for a vocalization (for example the "woooh" in Bon Jovi's "Livin' on a Prayer"), or using an interesting word or a short phrase that makes the audience think.

2) Buildup and dynamics: As I have already mentioned in my other songwriting articles (use the meta tag to visualize them all), dynamics are crucial. To make a chorus really stand out it's important to put it at the right place in the song, so that the song is dynamic.
To make a song dynamic there must be alternation between quieter parts and louder parts, parts in which the drum beat is less strong and parts in which it's more in the spotlight, and more importantly for the chorus placement, there must be a buildup. In order to make a chorus effective there must be a pre-chorus that prepares the listener to the best part of the song like a wave: first there is the backwash, then the wave comes with full force.

3) Frequencies and tempo of the chorus: ideally, unless we are experimenting in the opposite direction (loud chorus and pre-chorus and super quiet chorus), the chorus is the part in which all the frequencies of the song explodes, so for example it is where, if a singer was singing the verse on a lower octave, he passes to the higher one.
Similarly as per the voice, we can set up the arrangement of the song to make sure the "hook" (the part of the song that grabs the attention of the listener) is in the chorus by using the frequencies that the human ear is programmed to prioritize, the ones of the human voice (around 2/2.5khz), by adding instruments (piano, strings, synths and so on) with octaves that gravitate also around that area.
On the other hand, in the other parts of the song, we can make the opposite: leave room for lower octaves, or, alternatively, we can use only thin sounds during verse and pre-chorus and let the mid-low end part of the song drop only during the chorus.
Finally, some famous producer likes to add 1 or 2 bpm to the chorus tempo: they say it's practically unnoticeable, but it gives the chorus an additional sense of upbeat that makes it even more energetic.

4) Choose the emotions to transmit: this suggestion is interesting because it applies to many forms of art, from writing a book or making a film, to composing a song;
it's important to have clear in mind the emotions we want to provoke in the listener.
You wouldn't like to see a comedy film that halfway, out of the blue, becomes a scary horror, and the same concept applies to a song: you need to have clear in mind whether you want to talk about something happy, melancholic, angry, and let the song soak into this mood, so that you will carry your feelings through the song (and the song will be more authentic), and at the same time the listener will connects more to it and it will resonate with his soul.

5) Chord progressions and alternation: many memorable songs have a theme that repeats during the various parts in different forms, but to make the song not repetitive it's important to spice things up: if the verse is fast and full of chord changes, a chorus with few slow open chords can bring balance to the song, or on the other hand a song with a slow verse can double its speed during the chorus to add energy and an uptempo feel to it. Don't be afraid to mix and match, to take the chords of one part and change their position to give the song continuity and variety, and, final suggestion: never stop creating.


I hope this was helpful!


Become fan of this blog on Facebook! Share it and contact us to collaborate!!

Saturday, September 1, 2018

Review: It Might Get Loud - Djenthuggah Drums (with video sample)


Hello and welcome to this week's article!
Today we are reviewing a very specific product, created by the software house It Might Get Loud Prod.: Djenthuggah Drums!

Djenthuggah Drums is a drum sampler with sounds created explicitly to replicate the very particular sound of Meshuggah: the band that literally created the Djent genre, a type of metal that unites extremely low tuned instruments, a fast thrash metal riffing that sounds like an evolution of the Fear Factory tone, growling vocals (although other bands of the same genre offers also clean singing) and a very, very complex, prog-like drumming.

The drum tone is very specific, because the band relies heavily on samples for their albums (to the point that some member created the famous software house Toontrack, which is one of the leaders in drum sampling today): it has a powerful mid range designed to cut through the most dense mix, and a lot of attack and "clickiness".

Djenthuggah Drums is a sampler that features only the drum shells (kick, snare and toms) and no cymbals (in the video sample I have used the ones of Dieswitch Drums), and they come either with their standalone interface, or in Gog and Tci format, to be used with a Drum Replacer.

The sound is as expected powerful, and it's designed to poke easily through a mix, although I find it somewhere in between KVLT drums and Dieswitch Drums: in KVLT drums the samples are not processed at all, so it needs to be treated like an acoustic drumset, in Dieswitch Drums the samples are already processed, so they can be used right away, while in Djenthuggah the samples are yes processed, and they also offer 3 parameters each to fine tune them, but I still had to mix them when working on the video sample, adding some reverb on the snare and toms and some highs on the kick in order to make it sit better in the mix.

The bottom line is that this small sample pack will be very useful for all the Djent lovers out there, but be ready to work on it and blend it with other kits in order to obtain a polished result.

Thumbs up!


- Snare: Kumu Birch Custom 14″ x 5,5″, SuperWoodHoop

- Toms: Kumu Birch Custom 10″ x 7″, 12" x 8, 14″ x 12″, PowerHoop

- Kick: Kumu Birch Custom 20″ x 16″, SideHoleOver 50 samples.

Saturday, August 25, 2018

Seymour Duncan Blackout vs Emg 707 bridge pickup comparison (with video sample)


Hello and welcome to this week's article!
The title speaks for itself: I wanted to compare my 2 favourite active pickups, the ones that I am mounting in the bridge position of my 2 guitars, to see how they perform with exactly the same settings (Jst Ben Bruce amp sim).

To be honest the comparison is not 100% fair, since I have used the same settings and as you can see the Emg 707 has a much lower output compared to the Blackout, nevertheless I wanted to show you how big can be the difference from one pickup to another, even among actives.

The Emg 707 (that I use in a LTD MH-417) features an alnico magnet, which gives it a more classic tone, thus retaining power, tightness, and sits extremely well in the mix.
By tweaking the amp you can achieve many different tones and due to the not so extreme output it retains also some dynamics, which are not so common in active pickups.

The Seymour Duncan Blackout (mounted on my Ibanez ARZ 800), on the other hand, is raw power. It has a much higher output, a ceramic magnet, and even if it has a bit too much lower mids, it has this slightly scooped high-mids that makes it clear in a very pleasant, not ice-picky way. This is the first version, the AHB-1 designed by Dino Cazares of Fear Factory, which is more manageable than the others.

From this comparison probably the Blackout comes out as a winner for metal, it is punchy, full of low end, and it has the right clarity to bite in the right frequencies, but I strongly recommend anyone also to try the Emg 707 and set the amp accordingly, you will discover why it is still today considered a 7 strings standard, especially in the studio, where a more controlled tone and the right mid range can make the difference in the mix.

Which one do you prefer?


Become fan of this blog on Facebook! Share it and contact us to collaborate!!

Saturday, August 18, 2018

Review: It Might Get Loud - KVLT Drums (with video sample)


Hello and welcome to this week's article!
Today we are going to review a very particular drum sampler, produced by It Might Get Loud Prod., that tries to recreate a sound that made the history of heavy metal: the classic early '90s Norwegian black metal one.

In the early '90 Norway took by storm the metal scene with the most extreme, satanic, fast and malevolent fringe of heavy metal ever conceived up to that moment, with some young metalheads that took the sound of Venom, Celtic Frost and Bathory and brought it to a new level by adding to the speed of the fastest part of thrash metal (like Slayer) screaming vocals, a pinch of raw punk attitude and lyrics that depicted black and cold atmospheres, often referring to Satan and occultism. 

Bands like Darkthrone, Mayhem and Emperor were formed by extremely young guys, angry with the establishment and the modernity, and their sound is characterized by very raw and lo-fi recordings: the early albums of Darkthrone were literally recorded with a four tracks tape recorder, and those limitations contributed in making the records even more menacing and unpolished.

Kvlt drums is a very peculiar drum sampler, because it tries to recreate this raw and unprocessed sound, that feels like being in a rehearsal's room, and that lends itself to the fastest and most in your face blast beats and grooves.

As I mentioned, this drum sampler is completely unprocessed, unlike the Dieswitch Drums produced by the same company, and it lends very well to a deep mixing session, thanks to its many layers of velocity, but I have decided to use the raw sound, completely untouched, for my video sample, in order to give you an idea of the starting sound.

This is another very pleasant drum VSTi to work with, a good bang for the buck, and I suggest any fan of the cold, northern sound to check it out, also because, being unprocessed, gives us a lot of room for shaping the sound exactly the way we want.

Thumbs up!


Specs taken from the website:


- 1 Kick

- 2 Snares (Piccolo & Wooden Tama Snare, Sidestick + Left & Right Articulations)

- 3 Toms

- 1 Hihat

- 1 Ride

- 2 Crash

- 1 China

- 2 Splash

- 2 Unique FX Cymbals (Lid of a stove = minichina & an aluminum pan = zilbell)

Drums played by: Peter Zana
Engineered & mixed by: Ron D. Rock


Become fan of this blog on Facebook! Share it and contact us to collaborate!!

Saturday, August 11, 2018

5 ideas to get your music creativity running


Hello everyone and welcome to this week's article!
It's been a while since our latest songwriting article, maybe I had some songwriter's block myself, so I started thinking: what could be some effective way to win back some inspiration?
Here's some tip I think may be useful:


- Mix things up: try to look at your music from a different point of view; if you are a singer that writes starting from a vocal line try to start from a guitar riff, or from a drum beat. If you are only a guitarist try using a different guitar, with different sound features, or a different amp, stompbox etc. If you are a mix engineer try to ditch your daw, your favourite plugins and get out of your comfort zone: change daw, change plugins, start from zero just following the rules and your knowledge, all these small changes will help you seeing things from a different perspective.

- Take a pause: creativity is not (luckily) a "use it or lose it" skill, either you have it or you don't.
Sometimes we expect the creative flow to be constant, like water from a tap, through all our life and we get scared when it is not flowing ALL THE TIME.
Sometimes it stops because we have other things in our mind, or because we want to put these ideas into practice at a faster pace than they come. Let the ideas arrive slowly, don't push them, even if it takes months: every attempt in forcing them will result in uninspired, procedural music.

- Try to draw inspiration from other media: music is only one of the many forms the human creativity can be expressed: go to an art exposition, read a book (believe it or not the world is freaking full of AMAZING ones), go to cinema, explore the best videogames and you will notice that all these inputs will pour new mojo in your half empty musical ideas glass.

- Listen to a completely different genre of music: I know, all you want is to listen and play true norwegian satanic black metal, but, guess what, music doesn't end there, and you shouldn't take every other genere with diffidence.
Choose one or two genres at the complete opposite of what you are currently listening to and deep dive into them: try to understand them, to find out why people listens to them, what are the feelings those musicians wants to express with their music, you will find out the reasons WHY that music is being played, and you will find out that usually they are good reasons, and this experience will give you a fresh perspective also towards what you are currently loving.

- Change your environment: what we have around us influences our creativity and our perception of reality. Sometimes if everything around us is always the same we can end up with the same ideas, the same colours in our palette. I am not saying to move to another house, but maybe taking walks to different parts of the city, hanging out (or jamming) with someone different or having a vacation to some place different can literally make new ideas bloom into our mind.


I hope this was helpful!


Become fan of this blog on Facebook! Share it and contact us to collaborate!!