Labels
BASS
(50)
COMPRESSION
(32)
DRUMS
(45)
EFFECTS
(49)
EQUALIZATION
(30)
GUITAR
(112)
HOME RECORDING
(95)
IMPULSES
(21)
INTERVIEWS
(19)
KARAOKE
(1)
LIVE
(10)
MASTERING
(61)
MIDI
(21)
MIXING
(179)
REVIEWS
(156)
SAMPLES
(69)
SONGWRITING
(19)
SYNTH
(3)
VOCALS
(31)
Saturday, January 21, 2012
HOW TO USE EQUALIZATION (free Vst Plugins included) PART 1/2
Hello! Today we're going to talk about equalization.
The job of this effect is to correct the timbric shape of the sound, operating on its frequencies. Usually with the term "equalizer" we can refer to any tone shaping control, and on the guitar amplifiers we usually have it under the form of pots, often divided in lows, mids and high frequencies.
First we can divide equalizers in two groups: active and passive.
The passive equalizers are nothing but filters that limit the passage of the selected frequencies, so they can not amplify a certain frequency but only cut. Most of common guitar amplifier equalizers are passive.
Active equalizers, instead, are the ones that attenuate or amplify a selected frequency, so they can be not only used to cut but also to boost certain frequencies (those are more rare on guitar amps, but some amp, like the Peavey Triple XXX, has them).
Then we can divide equalizers under a functional viewpoint in three groups: Analytic, Graphic and Parametric.
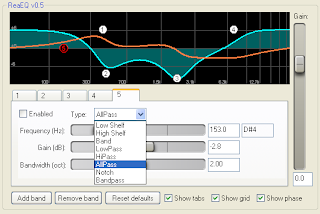
Analytic equalizers support a regular boost-cut control, and an extra control that gives the ability to move upper or lower on the audio spectrum the central frequency of the regular control. Usually we can find this on the mixing boards, and an example of it may be the free REAEQ vst.
Graphic equalizers were formerly created for the recording studio, but today they can be found on many guitar amps (for example Mesa Boogie Mark IV), or as a stompbox or rack effect.
A good example of graphic equalizer is the free KJAERHUS Classic Eq Vst.
Parametric equalizers are usually different: their interface is made of pots instead of a graphic representation of the spectrum, therefore forcing you to rely even more to your ears, and they supports a control to shape the width of the frequency modifications, called "Q". A good example of this approach to the matter is the free PUSHTEC EQ Vst.
When to use Equalization: EQ should be the last resort. This said, you should try to get your tone as perfect as possible right from the beginning: if you’re not completely happy with the tone you’re getting without an EQ, then keep trying different recording strategies before deciding to use it, as it will unavoidably affect the realism of the sound.
When recording with microphones, their placement can be one of the biggest factors here: don’t be afraid to spend the time trying as many different placements as necessary to get the right tone.
Keep in mind that small changes in placement can make a big difference, as for example pointing the microphone right towards the center of the cone or to some other point halfway between the center and the border, or keeping it perpendicular to the cone instead of setting it angled.
If you have great tone from the start, then EQing during the mixing process will be little more than gently pushing the sound into its place on the mix.
Beware of Frequency Masking: Frequency masking is where the frequencies of two (or more) instruments are fighting for the same place in the spectrum, and it is one of the most common problems encountered when mixing.
In facts, a sound may have (in addition to its root frequencies) other Harmonics that contribute to its overall timbre. If two sounds share similar frequencies you could easily find yourself in the position where some of these Harmonics are being masked in the mix; meaning that the instruments sound different than they do in isolation, or just disappear, and this problem emerges with more clarity while listening to the mix in mono.
There are three ways to deal with eq masking problems:
1 - Try to Pan the two sounds on different places of the soundstage, and see if the problem is solved.
2 - Create a priority list of your tracks, and start carving some db from the troublesome are of the "less important tracks", until you can hear with more clarity the primary tracks (e.g. Vocals).
3 - When the aforementioned operations are impossible, the last chance is to modify the arrangement of the song, taking out one of the fighting tracks from the part where the mix becomes too crowded to be heard clearly.
CLICK HERE FOR THE PART 2/2 OF THIS TUTORIAL
CLICK HERE FOR A GUIDE ABOUT HOW TO RECOGNIZE THE FREQUENCIES!
Become fan of this blog on Facebook! Share it and contact us to collaborate!!
Subscribe to:
Post Comments (Atom)


No comments:
Post a Comment